So with Thanksgiving this week, I figured it'd be a great way to write an article covering how to make your own pumpkin puree. Not only will this impress people, but it's pretty easy to accomplish, and seems to bring a much better taste to pumpkin pies and other pumpkin based dishes.
When making your own pumpkin puree, you won't use the pumpkins used for Jack O lanterns, but rather the smaller pumpkins, usually about 6-8 inches tall and wide. These are usually called "pie" pumpkins, but I've seen them labeled as cheese pumpkins as well. These are supposed to be slightly sweeter than the larger pumpkins, and, as far as I'm concerned, much easier to work with. One pumpkin will usually get you about 3 cups of pumpkin puree. 1 pumpkin pie only requires 1.5 cups, so I usually make 3 pies or you can save the extra to make pumpkin bread or something else pumpkin based.
You will need the following tools/utensils:
- a pie pumpkin
- double pot steamer
- large knife (serrated is a bit safer to use, but sometimes not as easy to cut with, I use a cook knife)
- cutting board
- hand blender
- metal ice cream scoop
- container for puree
- a teaspoon or tablespoon
- tongs (optional, but helpful)

The first step is to clean the outside of your pumpkin as you would with any vegetable before cooking. Once cleaned, cut in half and remove stem and the base. If you have trouble with this, it's okay to notch out the stem and base, you won't lose a significant amount of pumpkin. If the pumpkin has been out in the cold for a bit, it might be a good idea to bring it in to thaw a bit, as this makes a big difference in how easy it is to cut the pumpkin in half. Sometimes I cut through as much as I easily can, and then pull apart the remainder. It will make a snapping sound as it breaks.

Once you have your pumpkin separated, it is time to start scooping out the innards. A metal ice cream scoop works best for this. The edges of these scoops are pretty share and can easily scrape out the stringy insides. You'll want to remove the stringy part of the inside, the seeds, and scrape along the harder part of the inside of the pumpkin. Be careful not to scrape into the pumpkin meat too much. Some people pick out the seeds and save them for planting in the Spring or roasting them (I have not tried this myself, yet).
At this point, you will want to prep the steamer. Fill up the bottom of the steamer, cut one half into two pieces, if you desire, leaving the pumpkin as a full half is harder to handle after cooking though. Place basket into steamer base, innards down, and steam for about 30 minutes. You will need to cook the two halves separately, usually, because the size of most double pot steamers are restrictive.

Sometimes you will be able to tell that the pumpkin has completed cooking by looking for a visible separation of the pumpkin material from the shell. Larger pumpkins do not always have this separation. One other indicator which I've used is by checking to see how tender the shell is, if you can poke through it, then it is probably more than done. If there is no separation though, there will be more work to scoop out the pumpkin innards. Be careful removing the pumpkin from the steamer basket, as the pumpkin will be extremely hot. Sometimes removing the pumpkin will cause some of the inside to fall out, but if you're careful, you should have no problem transitioning it to a cutting board or other surface.

I usually use a teaspoon to scrape the pumpkin away from the shell. This should go relatively easy, with the exception of the heat from the steam. If you are dealing with a thicker pumpkin, then you may have to scoop into it using a spoon or other utensil. Be careful not to cut into the shell/rind, you want only the inside material. It is a good idea to scoop into its own container, in case you wish to save the pumpkin for a later date, or wish to drain/sieve the pumpkin.
You will want to now repeat the cooking process with the other half of the pumpkin and scoop out into the same container. Restore the water in the base of the steamer before cooking the second half. After the second half has completed cooking, and you have scooped it out into the container, you will want to use a hand blender to smooth out the material for better consistency and to eliminate any thick texture.
Once you complete blending, the material should look like this. At this point, the pumpkin is ready for use. I usually store in a refrigerator for a few hours to over night and strain some of the liquid that separates, but I find that some moisture in the material is good as this transfers over into whatever you are baking. As indicated, one pumpkin should be able to yield about 3 cups of pumpkin puree.
And there you have it, you have your own pumpkin puree. Impress your friends and family with this easily attained ingredient. You can usually prepare a whole pumpkin in a little over an hour. As a final note, I'd like to give credit to
http://www.pickyourown.org , as they were my primary resource for learning how to create my own pumpkin puree.

 The first step is to clean the outside of your pumpkin as you would with any vegetable before cooking. Once cleaned, cut in half and remove stem and the base. If you have trouble with this, it's okay to notch out the stem and base, you won't lose a significant amount of pumpkin. If the pumpkin has been out in the cold for a bit, it might be a good idea to bring it in to thaw a bit, as this makes a big difference in how easy it is to cut the pumpkin in half. Sometimes I cut through as much as I easily can, and then pull apart the remainder. It will make a snapping sound as it breaks.
 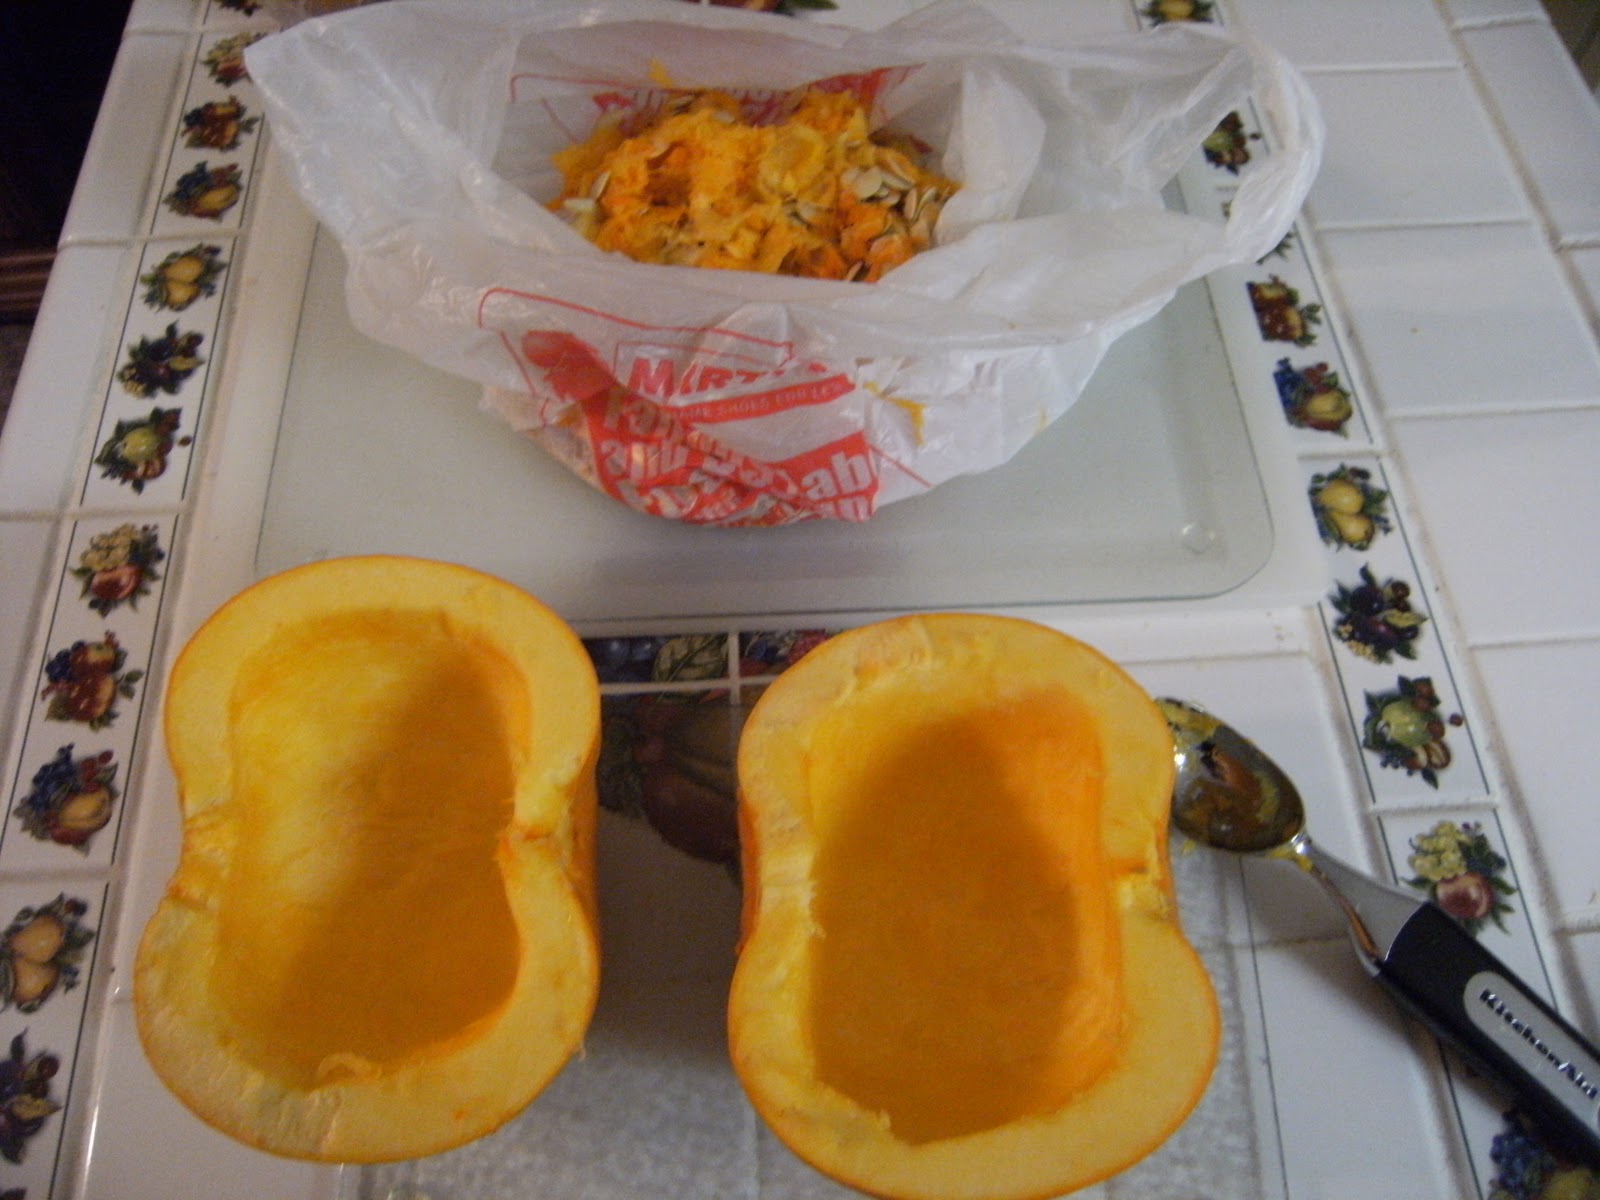 Once you have your pumpkin separated, it is time to start scooping out the innards. A metal ice cream scoop works best for this. The edges of these scoops are pretty share and can easily scrape out the stringy insides. You'll want to remove the stringy part of the inside, the seeds, and scrape along the harder part of the inside of the pumpkin. Be careful not to scrape into the pumpkin meat too much. Some people pick out the seeds and save them for planting in the Spring or roasting them (I have not tried this myself, yet).


No comments:
Post a Comment